


Pita Bread
I write to you from the road on this overcast afternoon. The sky is a band of mixed hues, blue and gray clouds hanging low and heavy in the tired lull of midafternoon light. The landscape is muted, with brown prairie grasses and the occasional small dark green bush. The world rushes by quickly outside the car window, passing slow enough to grasp, but not long enough to leave a lasting impact. Instead, the impression is formed from miles and miles of prairie terrain extending from the road to the farthest reaches of my vision.
Even before the world has overcome the death of winter, the landscape can be beautiful.
After traveling across North Dakota and part of Montana, the scarcity of people becomes evident as the rolling landscape and occasional ranch dominate the journey. It may be an hour or more before a significant settlement pops up along the road. While some people find this land endless or lonely, it feels like home to me. After traveling across the country more than once, I much prefer the beauty of nature to the busy roadsides of the manmade domain.
I am headed to the mountains for a weekend of skiing and lounging near the fire, saying my final farewells to the winter air and snow-covered ground. The car is heavy, weighted down by suitcases, ski boots, and warm bodies. The mountains are growing closer, as evergreen trees are becoming more numerous, grouped on the sides of the increasingly steeper hills. Still, the mountains are not within sight.

On long car rides, where the hours blur into the landscape and time is put on hold, food revives our sleepy souls. A cooler of snacks rests at my side, filled with enough sweet and salty snacks to please even the most selective of eaters. As with any road trip, I like to pack a few treats to make the time pass faster and to sustain us once we have arrived at our destination. Banana bread, monster cookies, and a few pitas are taking the expedition with us, ready when hunger strikes.
As the unending road rolls out before me, I realize how far I have come and how many hours there is to go before the Rocky Mountains will lay at my feet.
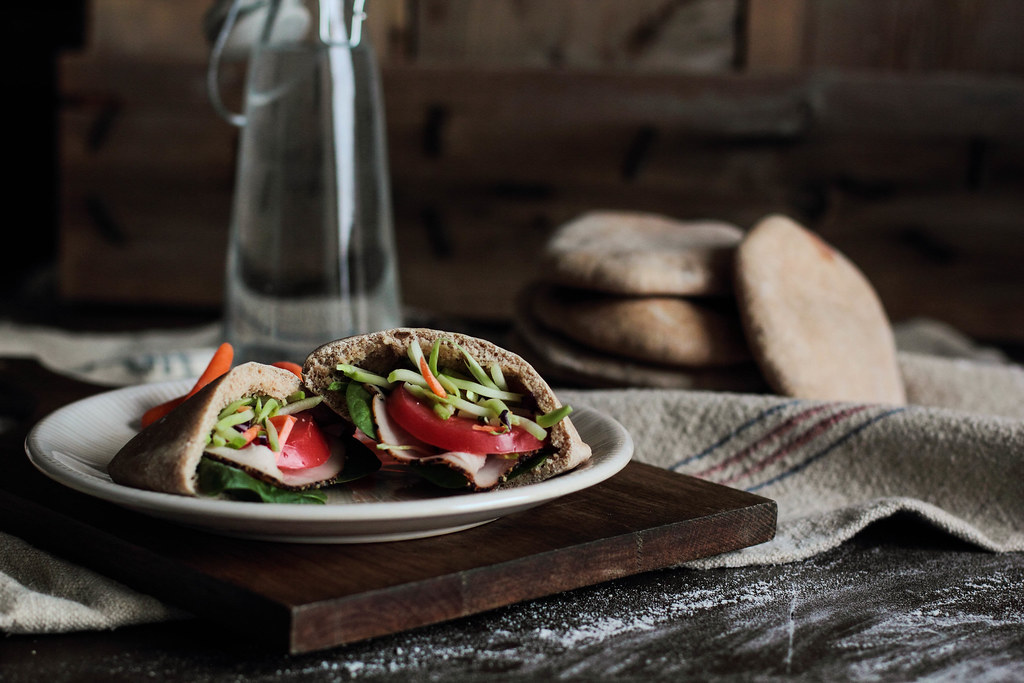
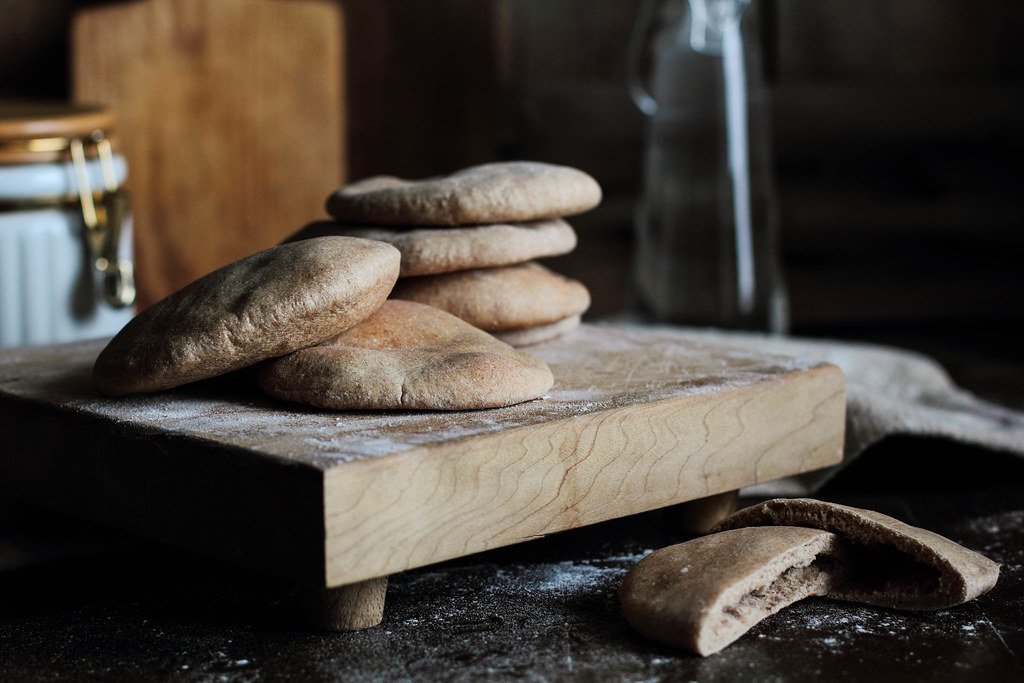
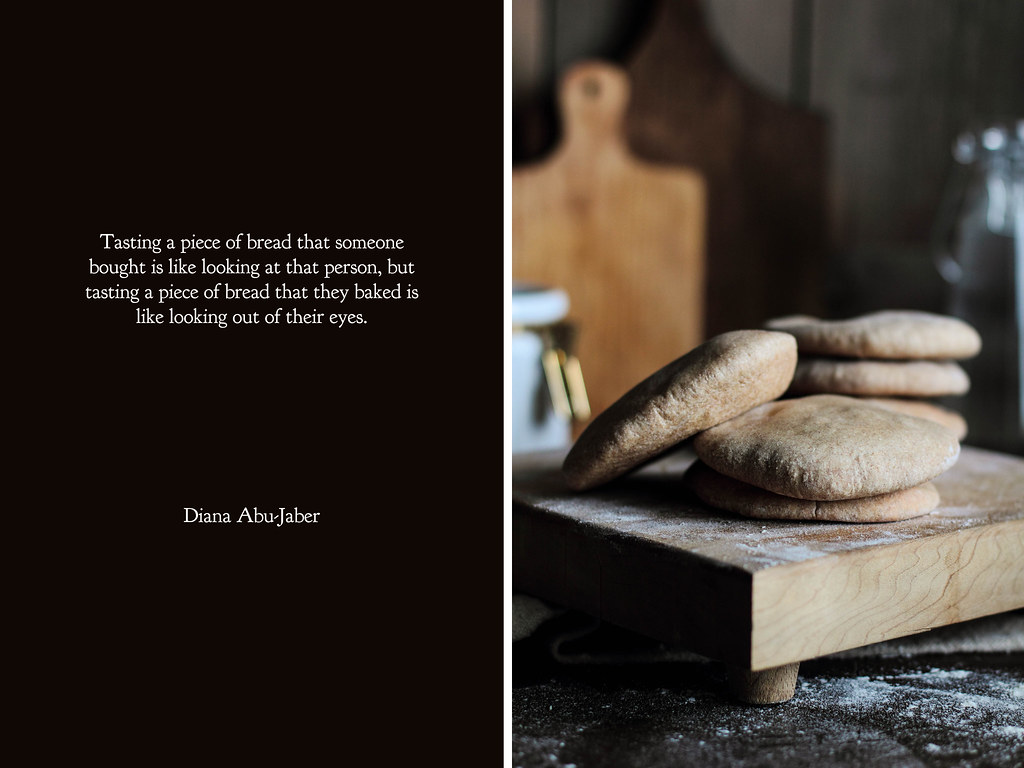
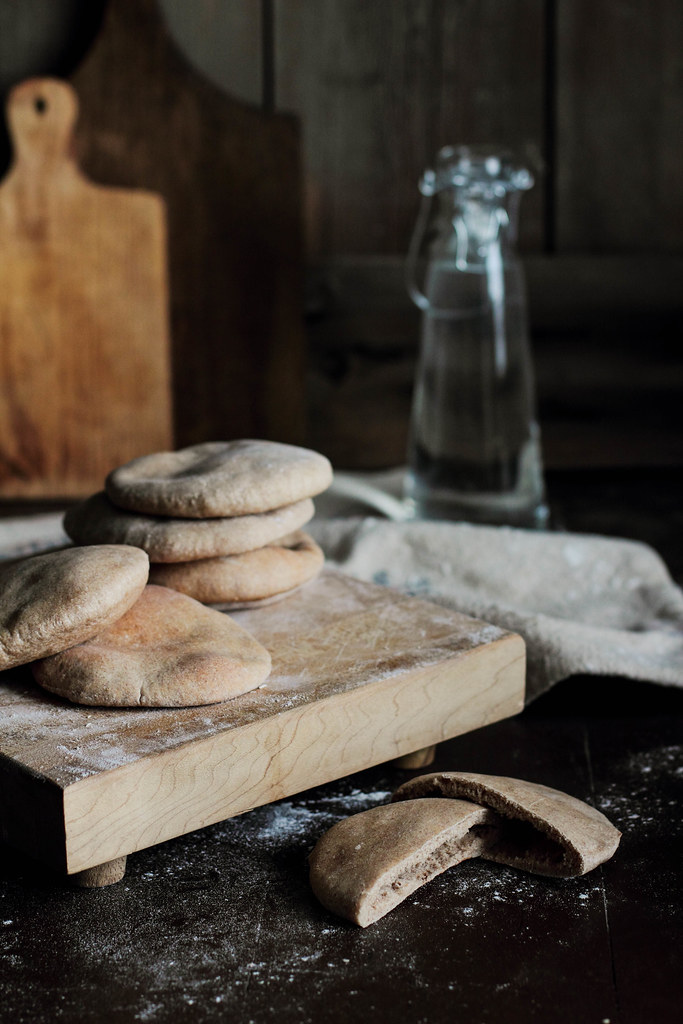
Homemade Pita Bread is an alternative to bread, acting as a vessel for your favorite sandwich ingredients. The bread is made from only a few ingredients, including a mixture of bread and whole wheat flour. The pita bread does take a bit of time to roll out and bake, but the effort is well worth the final product. By nature of the bread, the pitas puff in the oven, filling with air, and creating a pocket to be filled with meat, cheese, or vegetables. The pitas are best enjoyed in the first couple days when they are the most fresh.
One Year Ago: Chocolate Marshmallow Whoopie Pie
Two Years Ago: Almond Joy Tart
Pita Bread
Yields 8-10 pitas
1 1/4 cups (300 ml) warm water
2 teaspoons active dry yeast
1 tablespoon olive oil
1 teaspoon salt
1 1/2 cups (190 grams) bread (or all-purpose) flour
1 1/2 cups (180 grams) whole wheat flour
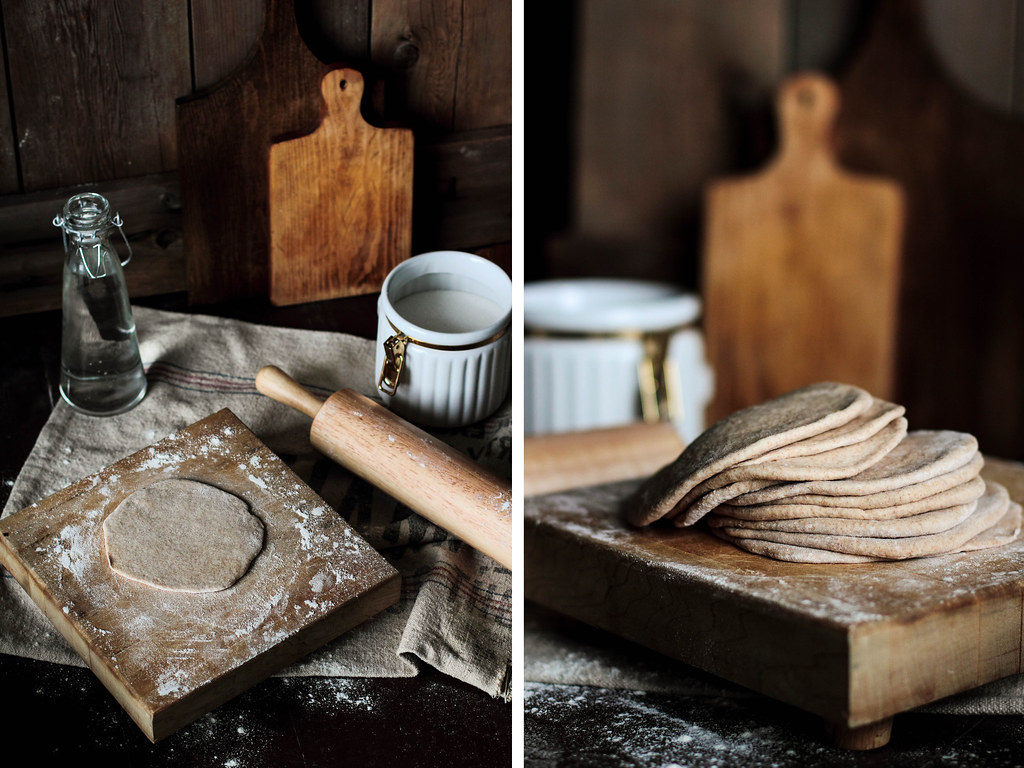
In a large mixing bowl (or bowl of a stand mixer), sprinkle the yeast over the barely warm water and allow to sit about 5-10 minutes until activated (looks frothy). Mix in the olive oil, and salt. Gradually add bread flour and whole wheat flour, mixing until the dough comes together. If the dough is too dry and will not come together, add small amounts of water until it does. Conversely, if the dough is too sticky, add flour until it becomes workable; however, do not add too much flour or the bread will become dense.
Turn out dough on a lightly floured surface and knead the dough for 7-10 minutes, or until elastic. Alternatively, using the dough hook on a stand mixer, knead the dough on the slowest setting for 7-10 minutes, or until elastic. Cover dough with plastic wrap or a kitchen towel and let rise in a warm place until doubled, about 1 1/2 to 2 hours.
Punch down the dough before turning out onto a lightly floured surface. Divide the dough evenly into 8 to 10 pieces (depending on how large you would like the pitas) and roll into balls. Using a rolling pin, roll out the balls until they are 1/4 to 1/8-inch thick. If the dough resists rolling out, allow it to rest for 10 minutes and it will roll out easier. Cover the rounds with a kitchen towel and let rise for another 30 minutes or until puffy.
Preheat oven to 500 degrees F (260 degrees C). Place a baking sheet in the oven and allow it to heat as well.
Toss as many pitas into the oven as you can fit onto the hot baking sheet and bake for 3-5 minutes. Once they are finished baking, wrap each pita in a damp paper towel or cloth to soften them. Press down on the pitas lightly to flatten.
Serve warm or store until later use.

 bread/yeast
Reader Comments (16)
Your pictures are always stunning. Makes me hungry just looking at them.
Happy Easter to you
xx Anna
Thanks so much for the recipe. I did turn some of the pitas into pita chips. Yum!